Introduction
It all began when the idea of EarthStation was proposed. An indulgence of an artist on the canvas of the earth; it was a brain child of Biju Bhaskar who had been meaning to practice building as an artist all his life. The idea was translated into our Minmini Puchhi, also known as A Firefly’s Dream, a dream come true. A first of its kind, there was no adamant client, but a complete freehand to explore the possibilities of an earthen building.
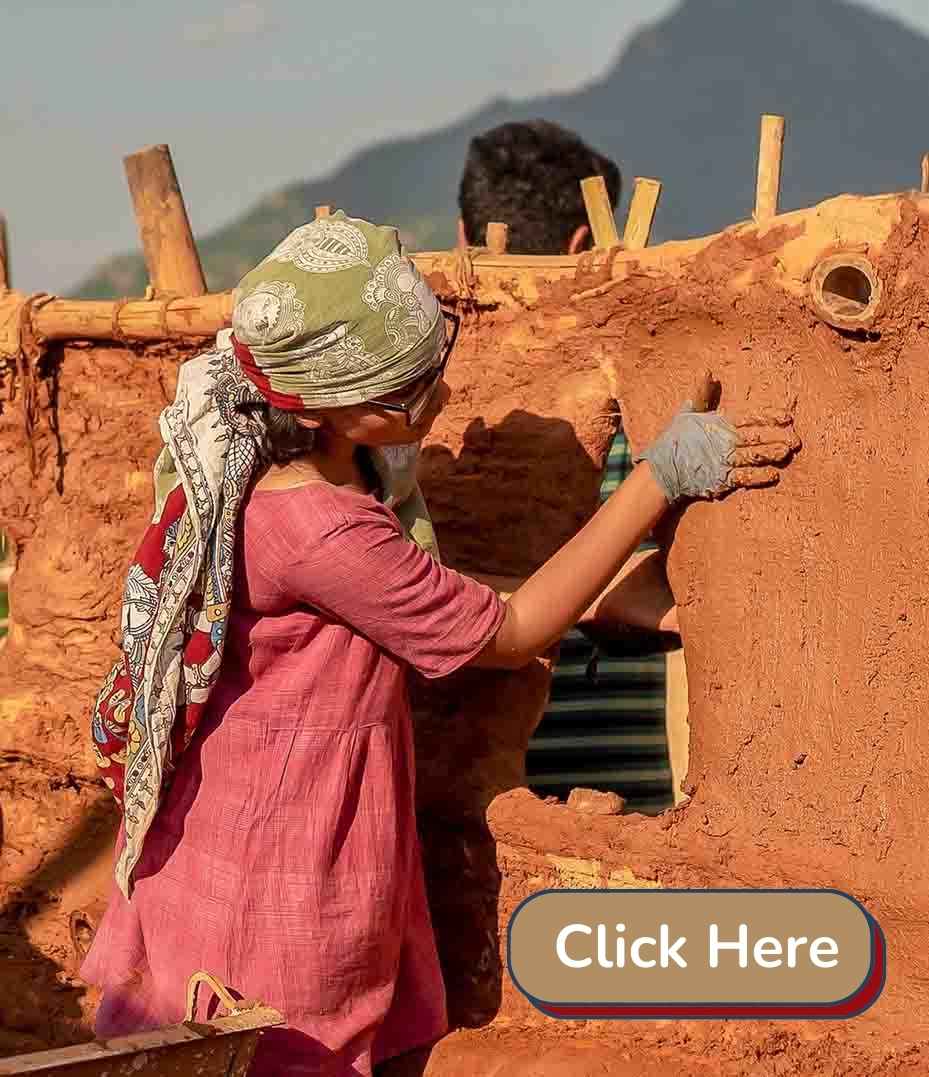
And Minmini Puchhi was determined to have an earthen floor. The most challenging part of an earthen floor is always the vapour barrier that contains the earth. Now most natural builders use an EPDM sheet as a barrier, but it is a compromise that we have all settled for. Call it a matter of principle or an obsession gone awry, a solution had to be found. Earthen floors have existed hundreds of years before plastic was first polymerised. Biju fondly recollected his visit to a Mana (Traditional Kerala home) at Palakkad, which portrayed an ageless example of mud floors.
Biju along with Sindhu, and the two endearing Vrikshas, have been traveling with to rich villages of our country documenting passionate people and their equally handsome homes. On one such journey to Palakkad, they visited Kavilpadinjaredathu Mana and were struck by the intricate simplicity of the aged home.
Mana : Grains of the Floor
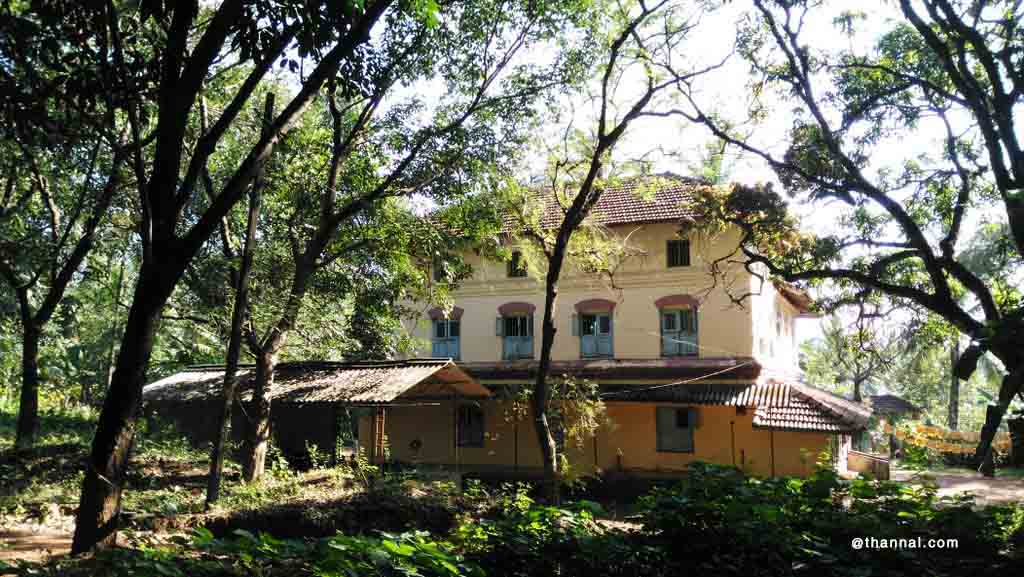
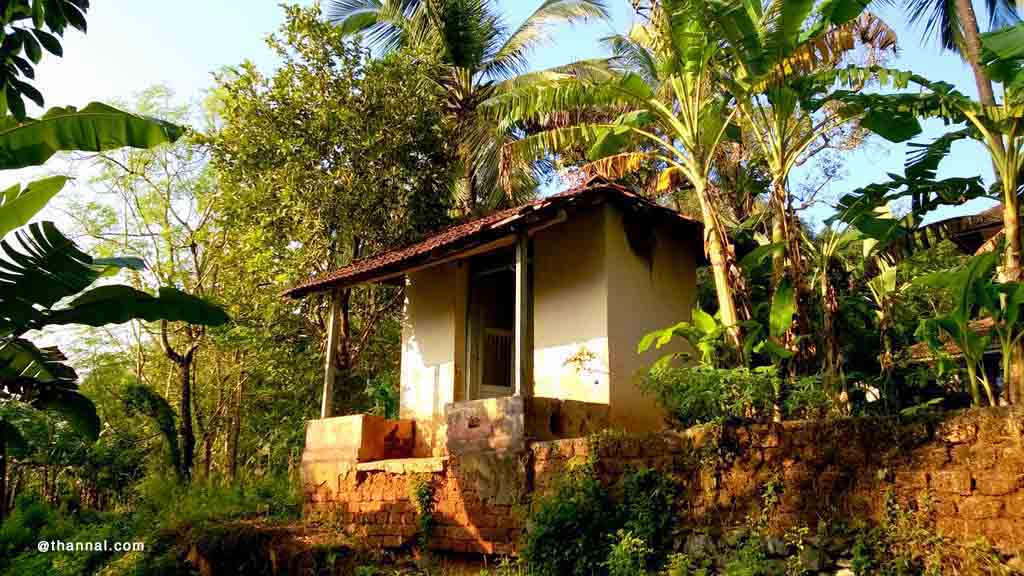
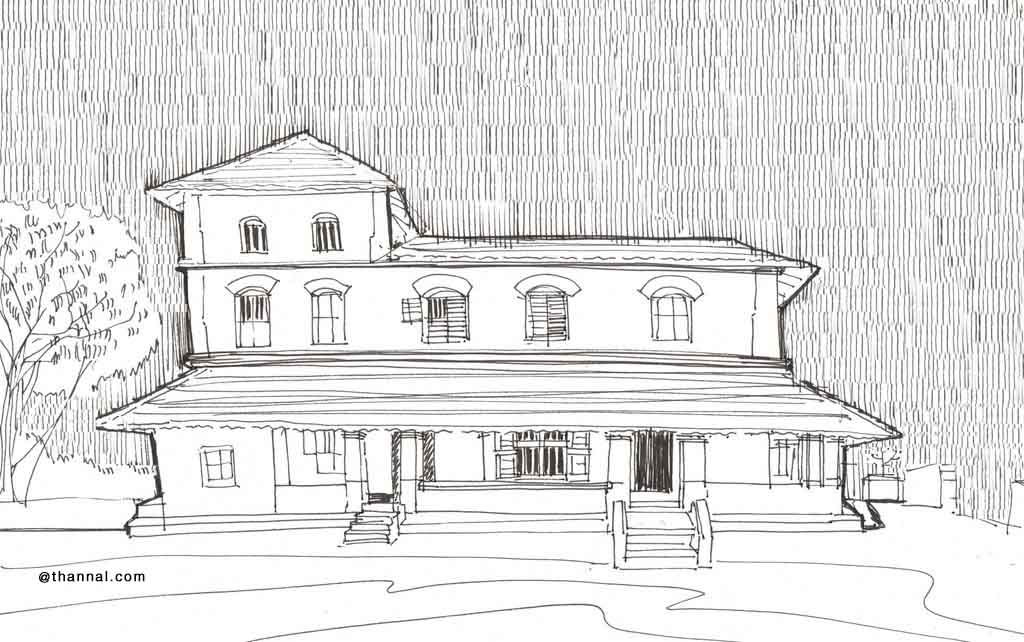
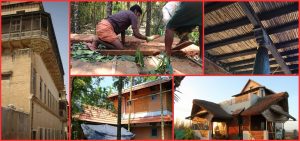
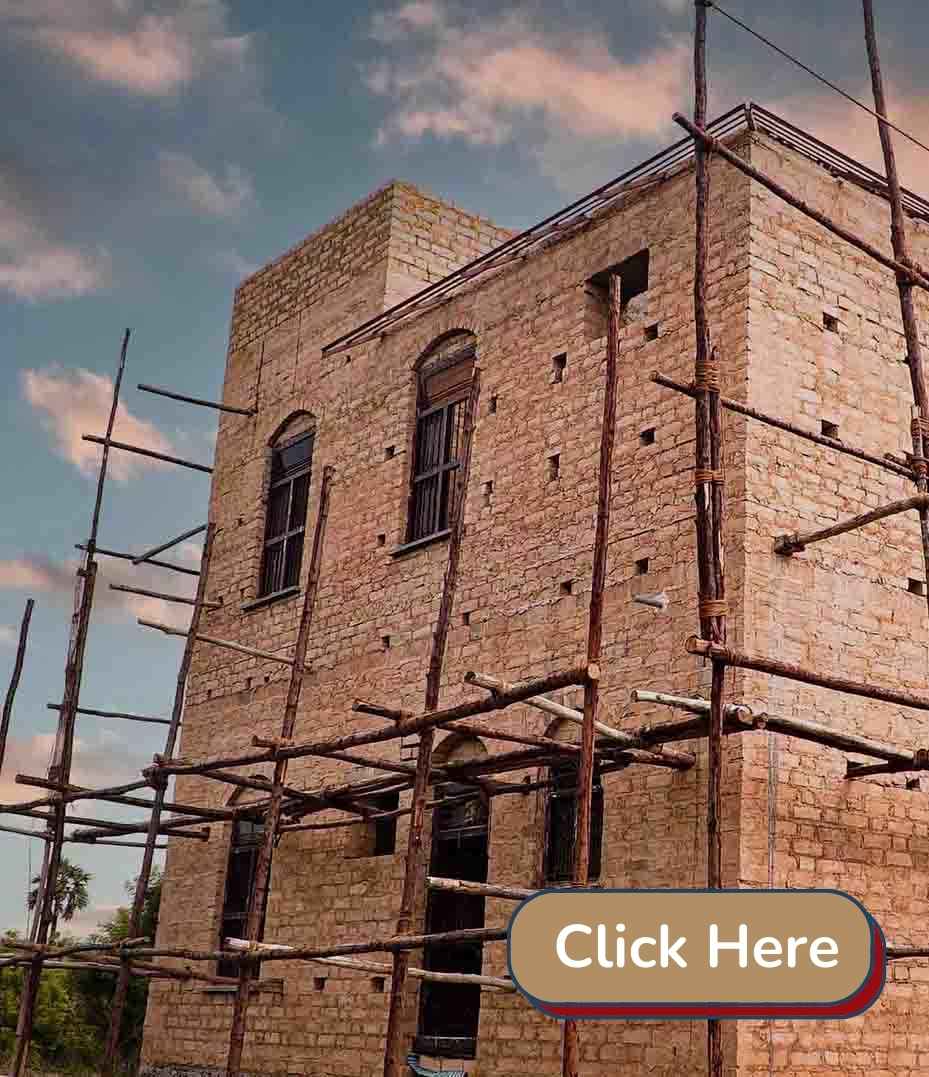
This charming 20th Century mansion is located amidst the serene groves in Payyanadom, Mannarkad, in the District of Palakkad, Kerala.
Mana once belonged to the Local ruler of that village. The present inhabitants of the homely Mana, Sreerag and his amma have been living in this Mana since his father was a child. Santoshji, Sreerag’s uncle, was the only one who knew the story of Mana, he was about 15 when his appa had bought the house after the demise of the previous owner.
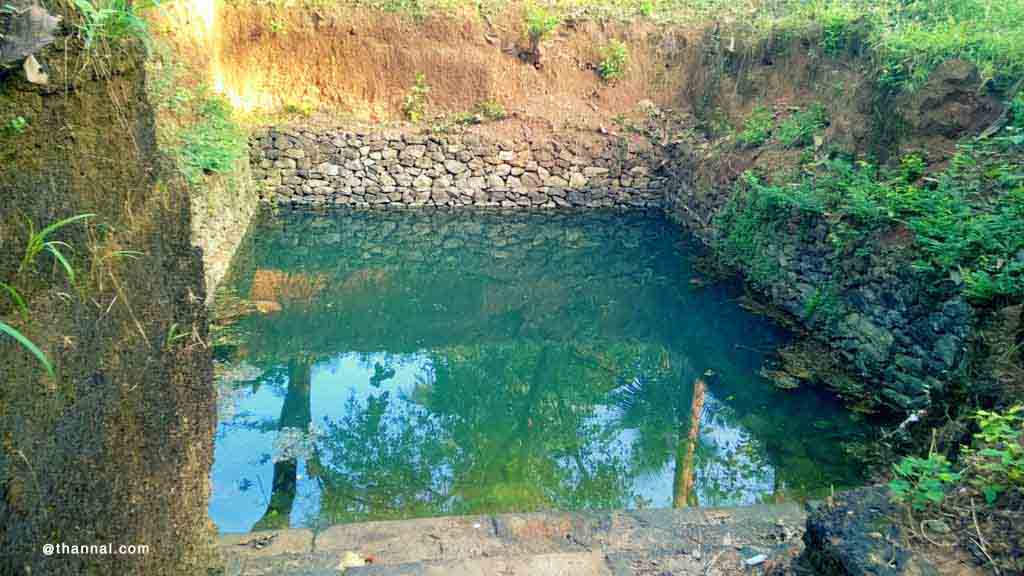
If one is to take a stroll around the mansion you would find a well-hidden kolam (natural pond) inviting you to jump in, in the backyard. Beside the dressed stone square pond is a small dilapidated shed. Flat laterite arches adorn the windows and door lintels. Locally available, laterite, is the most used material in the region. The Mana, as one could guess, had to be constructed with laterite, but was it?
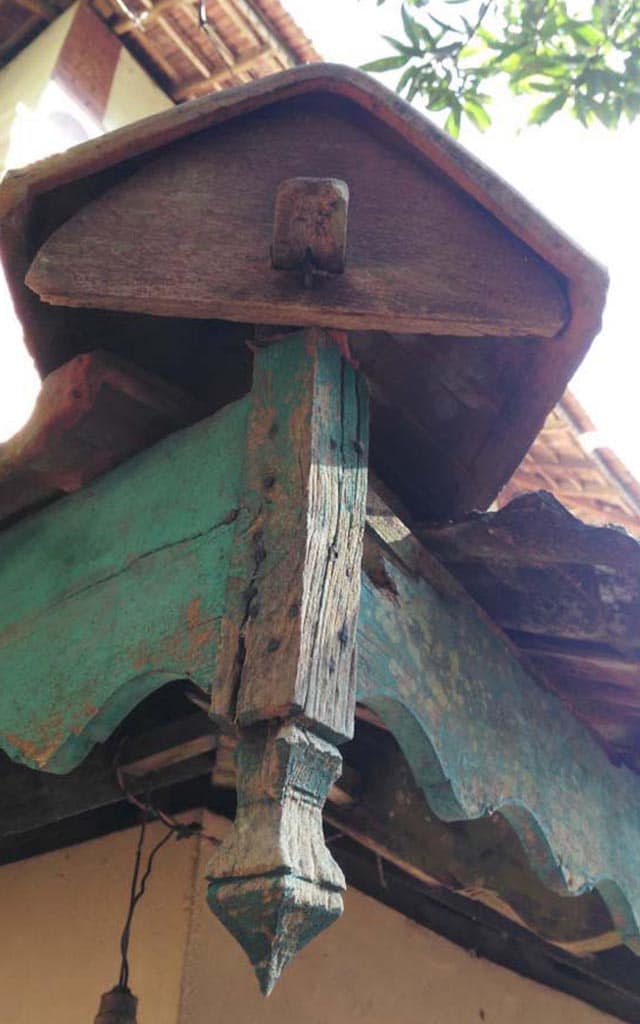
Walking further ahead, one can see an elegant doorway. This is a Padippura (house at gate), a typical feature of a traditional Kerala compound. It is a laterite construction with a typical roof joinery, finished with coloured lime plaster. The Padippura was once a pompous entry into the courtyard for the Mana, connected to the other side by a brick arched bridge built on a tiny moat that separated their land from the neighbours. It was a simple structure, yet so judiciously designed.
The Mana was built in 1921 by the then Ruler of the village, but a revolt took place in the same year during which it was destroyed completely. The owner was really upset about how the house was broken down to shambles. He then decided to rebuild the Mana.
Santoshji says,” The king wanted to build a home that was different. As you can see this house has a different proportion; he wanted to make it according to the ‘modern’ proportions and with different materials.”
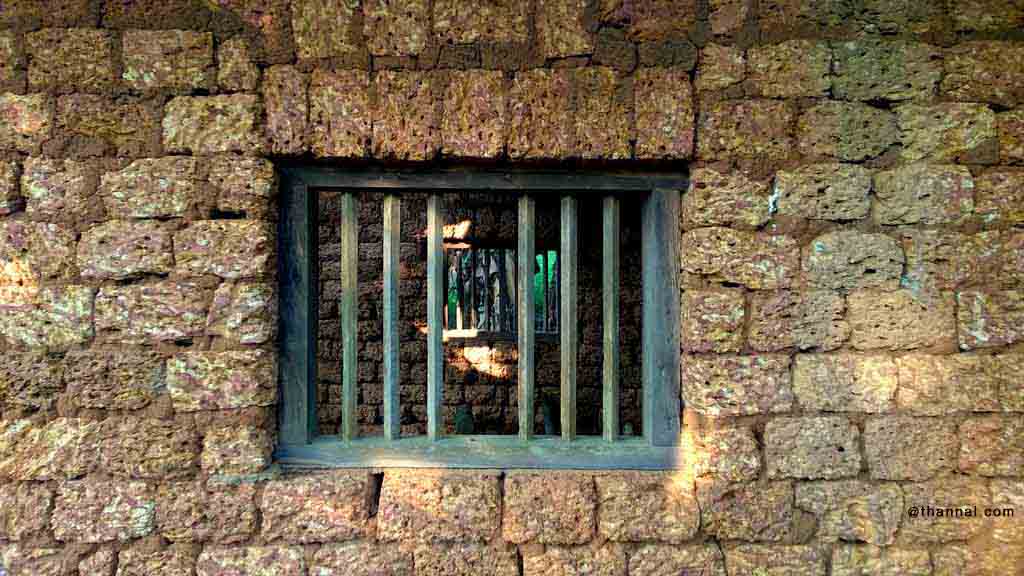
The windows were broader than usual and the doors were bigger with an interesting locking mechanism, this is what Santoshji had meant by modern proportions. The door and window members were a good quality wood, strong and well treated. The timber used in the building was mainly Teak , Jack Fruit and Vaka (East Indian Rose-Wood). Although the structural members were teak wood in the interior, the veranda had Rafterss that was coconut, all treated with cashew-shell oil. The doors, windows and door frames were Jackfruit and Vaka. They were coated with sesame seed oil before being used.


This house is made of bricks.
A safe assumption of ‘Laterite’ was indeed a mistake even a good architect would’ve committed here. The walls are over 45 cm, and at some places, 50 cm thick and they are made with bricks! This made the walls 2 bricks thick. The bricks that went into building the house were made using the soil from the land itself. The house is thus a local product of the soil from the own backyard.
Thus the Mana was re-constructed in 1925. It was then purchased by the Namboodiri family, a Priest family, in 1975. The Mana is very same to date with minute changes.

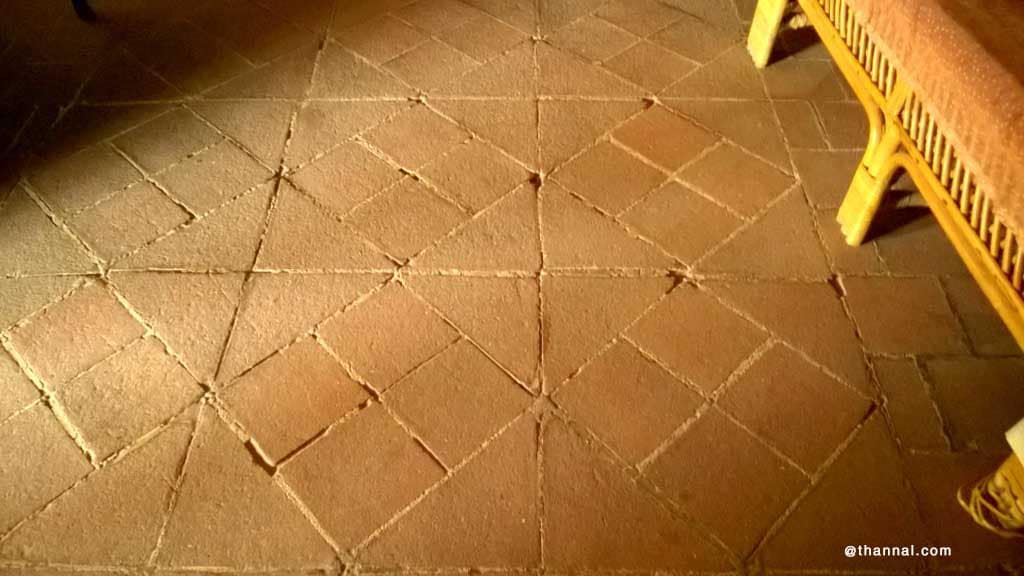
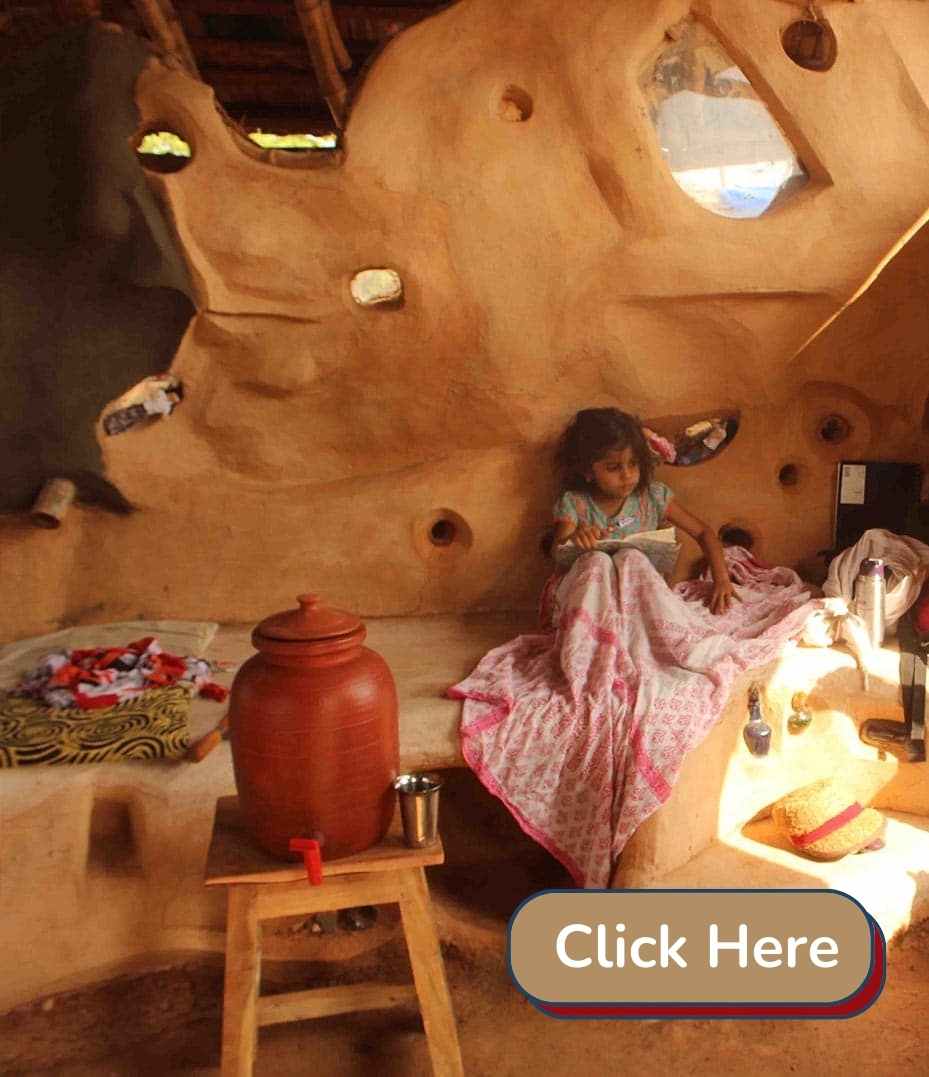
The floor finish of the living room is quite fascinating. The tiles of this floor are specially made bricks. These along with the plinth were the only part of the building that was not destroyed in the fire. Even after about a hundred years, they were firm and as good as new. The touch of the triangle & square baked bricks is indeed very comforting against the harsh sun outside. They were put together with a mortar that contained lime and jaggery.
As intriguing as the prospect of understanding a well designed natural floor is, it is equally important to understand the structural capacity of the building that was to take the load of earthen floors.
The foundation of the Mana was untouched, it was made with the black stones, laterite wasn’t good enough for the foundation here. They locally called the black stones, Karinkalla, which was sourced not far from the building. These karinkalla were put together with mud mortar up till the plinth level.
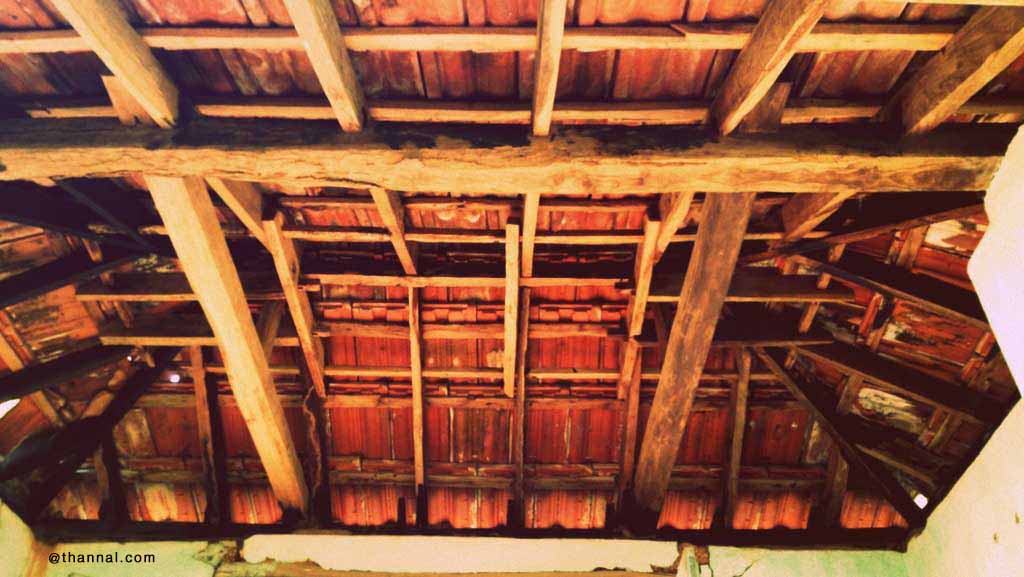
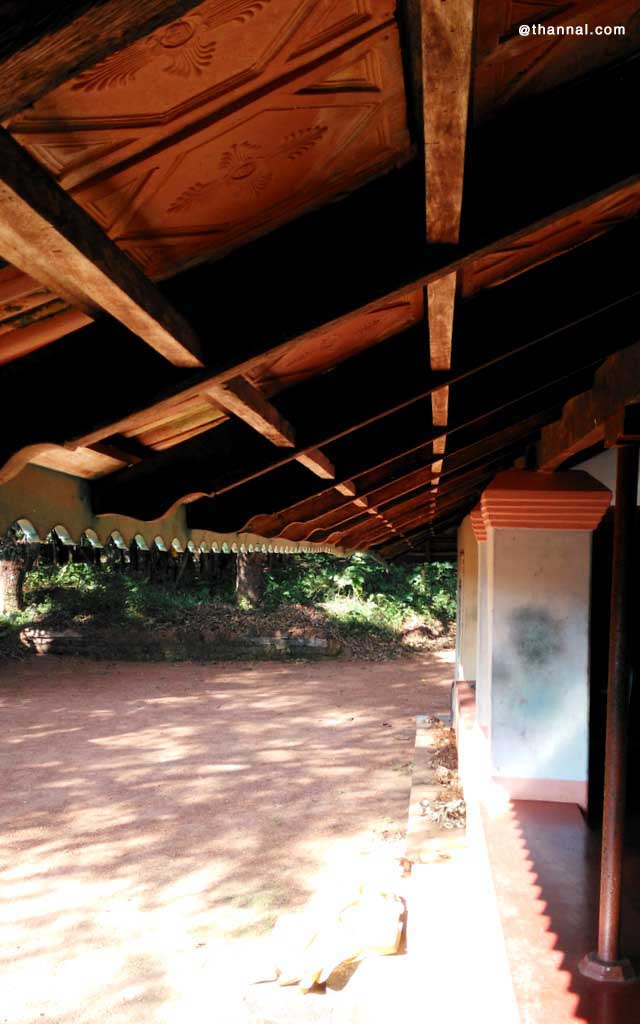
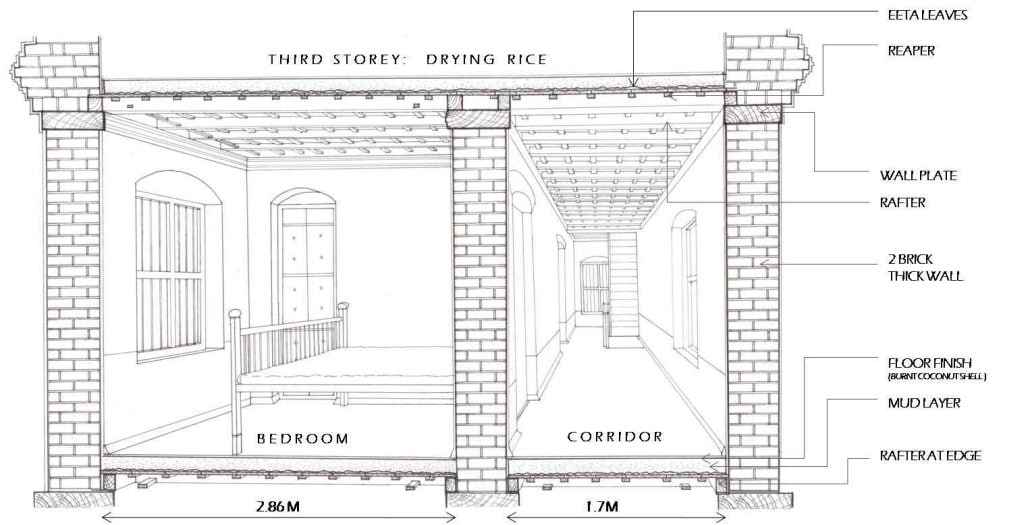
The 3 ft wide veranda was a charming space on the two sides of the house. It was covered with two layers of tiles, much like the roof of the structure. The double layer of roofing offered good insulation to the interiors as well as the semi-open spaces. One can observe a difference of about 4 – 5˚ C in the temperature. The veranda was adorned with thick masonry columns. The Rafters for the roof were coconut timber, well preserved with bitumen.
The walls were constructed with in-situ baked bricks, the soil for which was dug from the site, sieved and then used. The walls were a minimum of 1 ½ ft thick on the bottom floor. This was to carry the load of the earthen floor on top.
But how were they made?
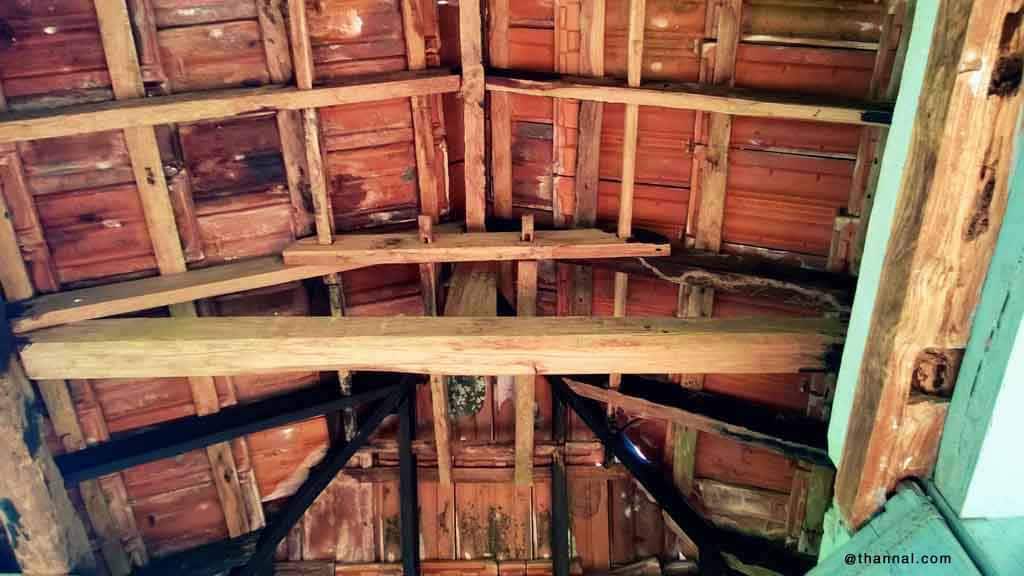
The floor was first structurally assembled. Rafters, Reapers and Wooden boarding were used for the skeleton of the underfloors. The timber used for the Rafters and Reapers was teak wood. This teak wood was treated in a traditional way here, in a stream nearby. It was first placed in flowing water to remove all its starch, which is termite dinner! That took about 2-3 months. After this, it was kept to dry for 2-3 weeks. The timber was then coated with a dark variety of cashew-shell oil before it was used. This rendered the wood further resistant against the attack of the termites.
A thick wall plate, the size of the brickwork underneath, ran all along the wall. This acted as the base for where the timber beams were placed with half lap joint.
It is worth a wonder how we use scientific means today, bending moment calculations, making machines to measure tensile and compression strengths, but how simple mathematics and a good understanding of a load distribution was used while calculating the distance between joists, Rafters and Reapers.
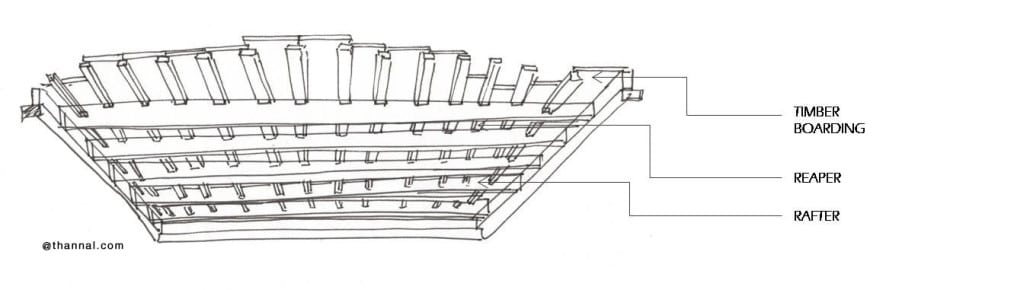
In a room with dimension 2.86×2.8cm, the C/C distance between the Rafters was 14″ (35 cm) while the C/C distance between the Reapers was 10 ½ ” (27 cm).
The dimensions of the timber members were calculated appropriately for the spans. Where the
Rafter = 3″ X 4.5” (8x11cm) Reaper =1.75″ x 1″ (4.5×2.5cm) Timber Boarding Depth= 3.5cm
An interesting observation was that the teak wood boarding was kept in the direction of the Reapers; this was done to avoid the gaps, which occur while keeping two adjacent planks, from being exposed. With soil coming on to the top of this assembly, it was indeed a logical decision to have been made.


The floors were essentially complete here, but why were earthen floors added on top?
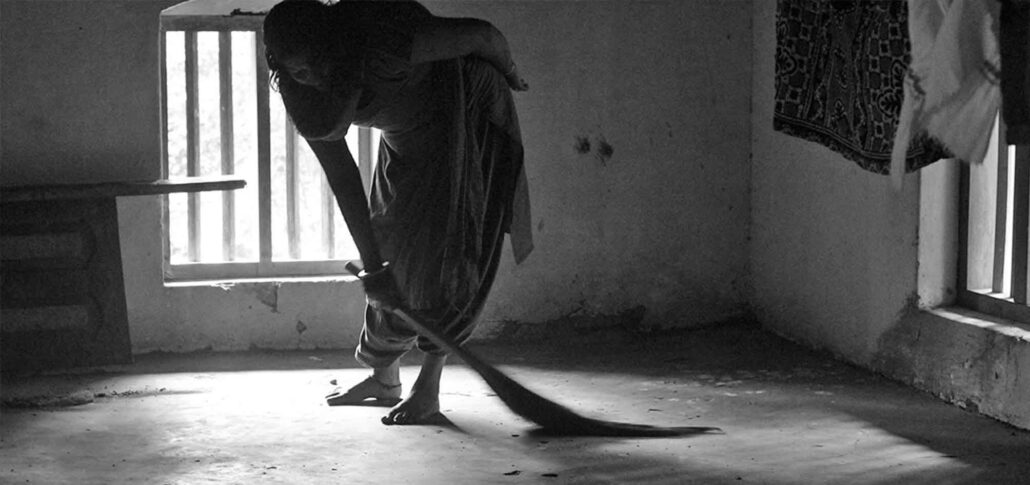
It has an interesting answer. Every house on those days had farmland, and this being a rich man’s house, had many. The main crop of this region is rice. Good quality rice is always parboiled before being consumed, but there is an important stage in between that determines the quality of the rice, drying. With the quantities produced on the farm, they needed a huge space for that. This is where the mud floor came into the picture. Earthen floors were a great accessory for drying rice and other grains.
In a room with dimension 2.86×2.8cm, the C/C distance between the Rafters was 14″ (35 cm) while the C/C distance between the Reapers was 10 ½ ” (27 cm).
The dimensions of the timber members were calculated appropriately for the spans. Where the
Rafter = 3″ X 4.5” (8x11cm) Reaper =1.75″ x 1″ (4.5×2.5cm) Timber Boarding Depth= 3.5cm
An interesting observation was that the teak wood boarding were kept in the direction of the Reapers; this was done to avoid the gaps, which occur while keeping two adjacent planks, from being exposed. With soil coming on to the top of this assembly, it was indeed a logical decision to have been made.
The floors were essentially complete here, but why were earthen floors added on top?
It has an interesting answer. Every house on those days had farmland, and this being a rich man’s house, had many. The main crop of this region is rice. Good quality rice is always parboiled before being consumed, but there is an important stage in between that determines the quality of the rice, drying. With the quantities produced on the farm, they needed a huge space for that. This is where the mud floor came into the picture. Earthen floors were a great accessory for drying rice and other grains.
Santoshji explains patiently the procedure for making the earthen floor.
He says,” The soil was sieved finely from the site first. Then the bark of a tree, locally known as Mula Ilavu , was put in lukewarm water and crushed into the liquid. This liquid was then used along with the sieved mud and trampled with feet. This trampling was carried out rigorously.
“They worked up the soil a lot, till they could not lift their feet from the mix anymore! The bark water was used to bind the mix together in a sticky workable paste. This combine was kept aside to cure till a vapour barrier layer was applied onto the boards.”
Eeta leaves ( Ochlandra travancorica) were placed closely together onto the wooden boards. This is the vapour barrier that would put modern plastic sheets to shame!
Eeta is a locally available bamboo reed that was used as a water barrier in the olden times. On another note, reed leaves were used for preserving mummies. The silica content present in the leaves absorbed all the moisture and kept the preserved ingredients dry.
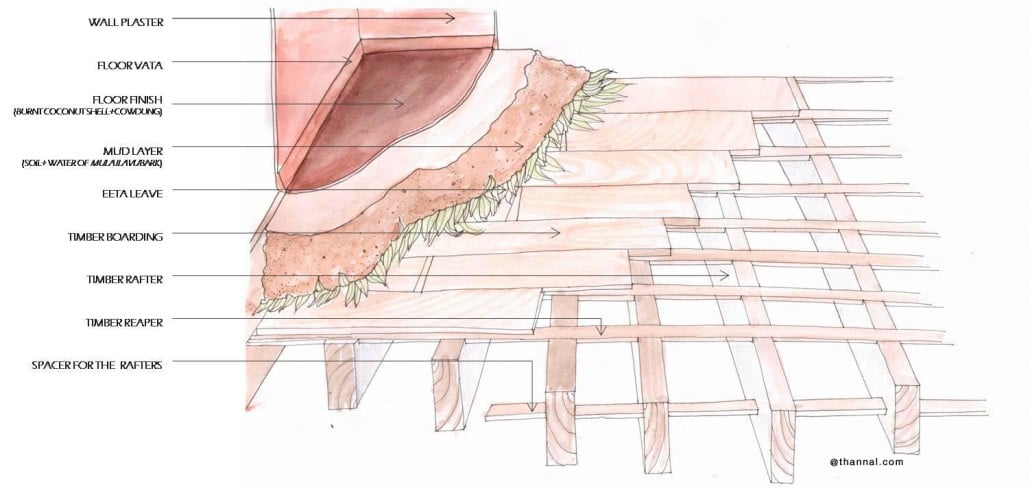
After careful placement of the leaves onto the planks by overlapping all the gaps that were left, the mud mix was poured on top. This was then compacted with an edikatta, a wooden bat used for beating mud. When the mud was compacted properly a mix of Lime and Sand was poured on top and troweled carefully. A layer of lime and sand was followed by the application of cow dung combined with burnt, powdered coconut shells; this was carefully applied by hands. It was then polished with coconut oil using a stone for days.
The porosity of this floor was amusing; it dried the rice grains efficiently. It was a breathing membrane, almost alive
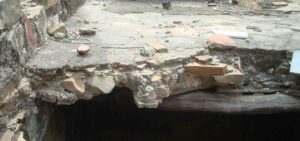
The floors of Mana today are reworked and made pucca by using cement combined with pure carbon obtained from old batteries as the floor finish.
“This was a compromise.” Santoshji mentions. “Now the floors are not functioning the way they used to. They used to soak in all the water from the rice and made it perfectly dry. Now it retains the water and the rice might even get spoilt with so much moisture.” He adds.
The repercussions of even a minute change are drastic. Imagine a vast country like ours, switching all-of-a-sudden to modern materials! ‘Rupee’ for your thoughts!?
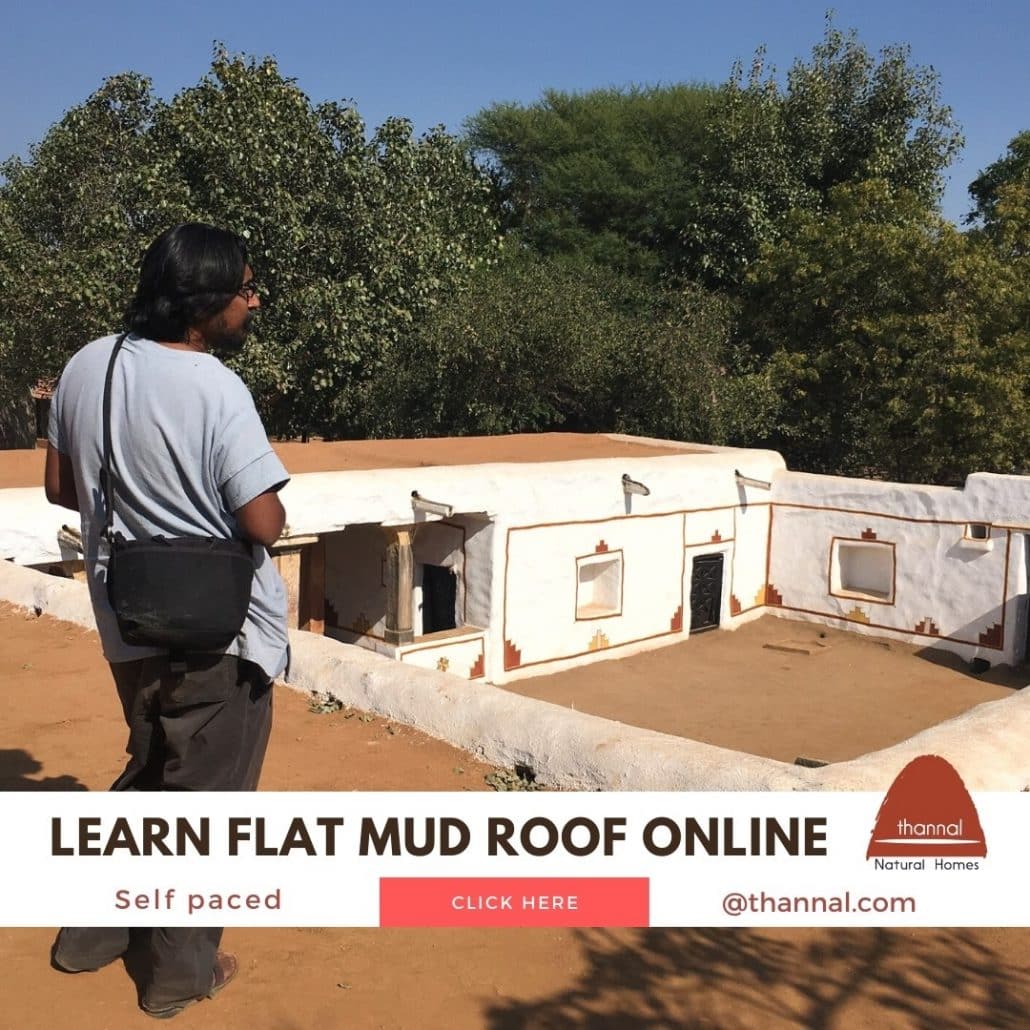
There it was, the natural building materials always made things beautiful and complicated at once. Once bitten twice shy, one can take more than a clue as to how leaves are to be used as a vapour barrier and it was only about a time when you could have an experiment of your own. This brings us to one very enterprising man who is having his own share of experiments with mud floors in a contemporary time. It is about time we met Devan Mash, and his experimental flat mud floor!

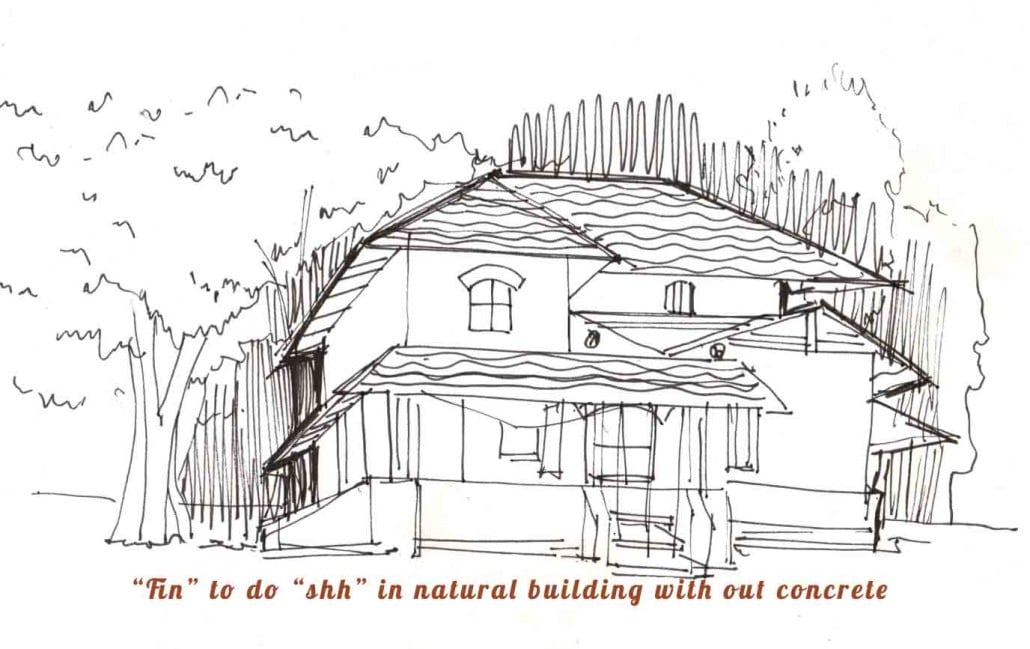
illustration: Anushree Tendolkar & Musharaff Hebballi

Biju Bhaskar, Musharaff Hebballi & Anushree Tendolkar
This article is by Natural builders Biju Bhaskar, Musharaff Hebballi & Anushree Tendolkar. This post is part of our Ageless village series,.

2 thoughts on “Traditional Flat earthen roof using Eeta leaves”
Hi John apart from ground floor here 2 more floors are there. Both floors are made using this method. So first floor will act as roof for ground floor.
Ok I’m confused. The title to this article says “Traditional Flat Earthen Roof”, but the article seems to be about earthen floors. Which is it? Also, the local appears to be tropical & this means rain. Does a flat roof with no drainage really work if it is surfaced with earth? Something does not add up here.